• Menu
  • Skip to primary navigation
  • Skip to secondary navigation
  • Skip to main content
  • Skip to footer

Straton Electrical

Electricians in Gqeberha (Port Elizabeth)

  • Home
  • About
    • Automation
    • Electrical
    • Energy Performance Certificates
    • Plumbing
    • Projects
    • Prepaid
    • Reach
    • Solar
    • Straton Water Monitor
  • Tips
  • News
  • Contact
  • Shop
  • Newsletter
  • Loyalty
    • Free Loyalty App
  • FAQ’s
  • BA Systems
  • Mbane
  • Reach Trust
  • Stratlec Shop
  • Straton Electrical
  • Straton Prepaid
  • Straton Solar
  • Home
  • About
    • Automation
    • Electrical
    • Energy Performance Certificates
    • Plumbing
    • Projects
    • Prepaid
    • Reach
    • Solar
    • Straton Water Monitor
  • Tips
  • News
  • Contact
  • Shop
  • Newsletter
  • Loyalty
    • Free Loyalty App
  • FAQ’s

Tips

Flattening the curve – What Every Solar Installer Needs to Know

18 May 2026 By //  by Alan

Flattening the Curve — What Every Solar Installer Needs to Know
Technical Guidance · Solar PV Installers

You Installed the Panels.
Now Flatten the Curve.

South Africa’s grid load profile reveals a clear daily pattern of stress and relief. This article describes that problem — and one approach to addressing it. The principles are universal. The execution will vary by site, inverter platform, and client.

Based on Eskom Actual Residual Demand data · Apr 2022 – May 2026 · Weekday averages
29.3 GW Winter evening peak demand
(18:00 average)
3.6 GW Seasonal peak gap
winter vs. summer
~5 GW Embedded rooftop solar
installed nationally

What the Load Curve Is Telling Us

The interactive chart below is not just a technical diagram. It is a map of exactly when South Africa’s electricity infrastructure is under stress — and by extension, when every poorly configured solar system on the grid is making things worse rather than better.

Two features of the curve demand attention from anyone who installs rooftop solar and battery systems. Use the controls to toggle between seasons and explore how the TOU tariff bands align with the actual demand peaks.

Interactive · Eskom National Grid Load Profile · Actual Residual Demand · Apr 2022 – May 2026
Eskom Data Portal · Actual Residual Demand · Weekday averages

National Grid Seasonal Load Profile

Summer: Nov–Feb excl. 15 Dec–15 Jan (353 days) · Winter: Jun–Aug (368 days)

CURVES:
Winter TOU (High-Demand Season) · Jun – Aug
Peak06:00–08:00 and 17:00–20:00
Standard08:00–17:00 and 20:00–22:00
Off-Peak22:00–06:00
Weekdays only · Sat/Sun: Standard / Off-Peak only
Summer TOU (Low-Demand Season) · Sep – May
Peak07:00–09:00 and 18:00–21:00
Standard06:00–07:00, 09:00–18:00, 21:00–22:00
Off-Peak22:00–06:00
Weekdays only · Sat/Sun: Standard / Off-Peak only
Key Findings from Actual Data
›Winter peak: 29.3 GW at 18:00 (residual) · 30.5 GW true demand
›Summer peak: 25.7 GW at 19:00 (residual) · 27.1 GW true demand
›Peak-to-peak seasonal gap: ~3.6 GW residual · ~3.4 GW true demand
›Summer midday dip at 13:00 (22.2 GW) — embedded rooftop PV effect
›Winter morning peak: 08:00 (26.0 GW) · Evening peak: 18:00 (29.3 GW)
›Summer morning peak: 06:00 (23.5 GW) · Evening peak: 19:00 (25.7 GW)
›Avg load shed in data: summer ~1.1 GW, winter ~0.5 GW (2022–24 period)
›Curves cross at ~05:00 — winter heating loads accelerate ahead of summer
Eskom Data Portal historical download (Apr 2022–May 2026) · Residual Demand = metered dispatchable generation + imports, excludes contracted renewables and embedded rooftop PV · True Demand adds back Manual Load Reduction (MLR) · TOU: Megaflex/Municflex 2025/26 (NERSA, effective 1 Apr 2025)

Reading the Curve

Look at the chart above and three things stand out immediately. First, a sharp morning spike from around 05:00 as the country wakes up — strongest in winter when heating loads stack on top of the usual morning routine. Second, a midday trough visible in the summer curve between 11:00 and 15:00, the fingerprint of embedded rooftop solar now suppressing grid draw during peak generation hours. Third, the most severe feature of all: the evening peak, where demand climbs hard from 16:00 and hits 29.3 GW at 18:00 in winter — at the exact moment solar generation reaches zero.

These three features define the grid’s daily stress pattern. They are as consistent as the sunrise. And they are precisely what a correctly configured battery system should be designed to address.


The Problem: What Most Systems Actually Do

Before describing a possible solution, it is worth being precise about what the problem actually is — because it is not the hardware. The panels, inverters, and batteries installed across South Africa are largely capable of far more intelligent behaviour than they are currently delivering. The problem is the default dispatch pattern that most systems follow after installation, and the absence of any deliberate strategy to change it.

The dominant pattern among installed solar-plus-battery systems follows a simple and deeply inadequate cycle:

The Common (Wrong) Dispatch Pattern

Battery discharges after sunset through the evening. Once depleted, the system draws from the grid through the night and into the morning. Solar charges the battery back up during the day. Battery reaches 100% by mid-morning and then sits there — fully charged, doing nothing — until the sun goes down again. Repeat.

On paper this looks reasonable. In practice it means the battery is idle at 100% through the midday period when it should be absorbing surplus solar generation — and it means the morning peak, one of the two hardest periods for the grid, is covered entirely by Eskom because the battery exhausted itself the previous evening and solar hasn’t recovered it yet.

The battery is cycling once per day, serving one peak, and sitting unused through most of the period when it could be most useful. This is not a grid asset. It is a glorified UPS.


A Possible Solution: The Full-Day Dispatch Model

What follows is one approach to addressing the problem described above. It is not the only approach, and its execution will depend on the inverter platform, battery capacity, site load profile, and the client’s priorities. The underlying principles, however, are consistent: the battery should be cycling in response to the grid’s actual daily stress pattern, not simply reacting to sunset and sunrise.

The model described here targets two discharge events per day — one at the morning peak, one at the evening peak — with two corresponding recharge events: a slow overnight grid charge during the off-peak trough, and a solar midday charge during peak generation hours. The target state of charge before each discharge is 95%, with a 40% floor maintained as an emergency reserve that is never drawn into under normal operation.

On a 10 kWh battery, the usable window of 95% to 40% gives 5.5 kWh per discharge event — 11 kWh of active daily contribution across both events. The specific numbers will differ by system size and load profile. The principle does not.

The 24-Hour Dispatch Cycle
22:00 – 06:00
🔋
Slow grid charge to 95% SoC
Off-peak period — lowest grid demand of the day. Slow charge rate to avoid adding load spike. System draws steadily through the night.
06:00 – 08:00
⚡
Discharge — morning peak cover
Battery discharges to cover morning loads. No grid draw. Floor: 40% SoC emergency reserve. Grid demand climbs sharply here — the battery absorbs it.
08:00 – 10:00
☀️
Solar ramps up, covers daytime loads
Solar takes over household consumption. Battery at ~40–50% resting. Grid demand is declining — no battery action needed.
10:00 – 15:00
🔋
Solar charges battery back to 95%
Peak generation window. Priority: serve loads → charge battery → export surplus only. Target 95% SoC by 15:00. This is the midday recharge that makes the second daily discharge possible.
Deferred PV charging: Do not start battery charging from solar at first light — allow morning solar (08:00–10:00) to serve loads directly while the battery rests at 40%. Defer bulk PV charging to the midday window when generation is at its strongest. This intentionally deepens the midday demand dip on the grid curve, maximising the embedded solar benefit at exactly the point it is most visible. The battery charges faster and more efficiently at peak irradiance, and the grid sees a more pronounced suppression during the 10:00–15:00 window.
15:00 – 17:00
☀️
Solar covers loads, battery holds at 95%
Battery fully charged and waiting. Solar still generating. Grid demand beginning to climb. Hold battery in reserve for the peak ahead.
17:00 – 20:00
⚡
Discharge — evening peak cover
The critical window. Battery discharges to cover all loads. Zero grid draw. Floor: 40% emergency reserve. This is where the national grid hits 29+ GW — every kWh discharged here is one less Eskom must generate.
20:00 – 22:00
🌙
Grid covers remaining evening loads
Battery at 40% reserve. Grid demand easing. System draws lightly from grid. At 22:00 the overnight charge cycle begins again.

On Overnight Grid Charging

Overnight grid charging is likely the most counterintuitive element of this approach — and the one most likely to need explanation to both clients and fellow installers. The principle behind it is worth understanding clearly, because the justification is not primarily financial.

Between 22:00 and 06:00, national demand drops to its daily low — around 19–21 GW. Generation capacity is in surplus. Coal stations that cannot be ramped down are running at minimum load. Pulling a slow, steady charge from the grid at this hour adds almost no marginal stress — it is absorbing capacity that would otherwise go to waste.

Compare that to the morning peak at 07:00, when demand climbs toward 26 GW and every available generation unit is running hard. A battery that is still recovering from the previous evening — drawing from the grid at this moment to recharge — is adding load at exactly the wrong time. The overnight charge eliminates this entirely.

This Is Not About Cost — It Is About When

The motivation for overnight grid charging is not primarily financial, though on TOU tariffs the off-peak rate saving is a genuine client benefit. The motivation is grid timing. Charging slowly through the night at low-demand hours, and discharging at the two daily peaks, is what active grid participation looks like. A battery configured this way is doing something useful 24 hours a day — not just for four hours after sunset.

On flat-rate and IBT installations, overnight charging costs the same per kWh as any other time. There is no financial penalty for the client. The grid benefit is identical. The case for doing it is purely about responsible system configuration.


The 40% Floor — Always Hold the Reserve

The 40% state of charge floor is not a soft guideline. It is a hard limit that should be programmed into the inverter’s depth-of-discharge setting and never overridden.

It serves two functions. The first is practical: it preserves genuine emergency capacity. An unplanned grid outage at 19:30, a client’s medical equipment, a power cut that runs longer than expected — the 40% reserve is what covers those events without the system being caught empty. The second is technical: consistent deep discharge below 40% accelerates battery degradation, particularly in lithium iron phosphate chemistry. Holding the floor protects the battery investment and maintains usable capacity over its service life.

The usable window — 95% to 40% — represents 55% of nominal capacity per discharge event. On a 10 kWh battery that is 5.5 kWh. On a 15 kWh system, 8.25 kWh. Twice daily that is a meaningful and consistent contribution. Do not be tempted to squeeze the floor lower to extend evening coverage — size the battery correctly instead.


This Applies to Every Installation

The full-day dispatch model described above applies equally to TOU-billed clients and to those on flat-rate or inclined block tariffs. The grid does not differentiate. The morning peak at 07:00 is just as real for a client paying a flat rate per kWh as for one on Megaflex (TOU). The battery’s state of charge at that moment has the same effect on grid stress regardless of the bill.

TOU billing provides a financial signal that reinforces good behaviour — cheaper overnight charging, more expensive peak-hour grid draw — but the underlying configuration logic is identical. An installer who only applies active dispatch management to TOU clients is doing a disservice to the majority of their installed base and to the grid they all share.

“The load curve is your configuration brief. It tells you exactly when the grid needs help. Your client’s tariff structure does not change that — it only changes whether the client notices the benefit on their electricity bill.”


Principles for Implementation

The following points describe what a system configured along these lines should achieve, and the considerations relevant to each phase of the daily cycle. How each is implemented will depend on the inverter platform and its scheduling capabilities — the intent here is to describe the desired outcome and the reasoning behind it, not to prescribe specific menu paths or parameter values.

1

Overnight Grid Charge — Off-Peak Window, Slow Rate, Target 95%

The intent is to enter the morning peak with a full battery, charged during the period of lowest national demand. The charge rate should be spread across the available window rather than concentrated at the start — a slow, steady draw is what makes this benign to the grid. On most platforms this means setting a charge current that would fill an empty battery over six to eight hours, not two. The specific current value depends on battery capacity and inverter capability.

2

Morning Discharge — Battery as Primary Source, 40% Floor

During the morning peak the battery should be the primary source, with grid draw minimised or eliminated until either the 40% floor is reached or solar generation takes over. The 40% floor should ideally be enforced at the inverter firmware level rather than purely as a schedule parameter — this ensures the floor is respected regardless of what the schedule is doing. On most winter mornings solar will not be generating meaningfully until well after the peak begins, so the battery carries the full load for this period.

3

Midday Solar Charge — Battery Before Export, Deferred Start

During peak solar hours the charge priority should be: serve loads → charge battery to 95% → export only the genuine surplus. This is the setting that enables the second daily discharge event — without it, the battery arrives at the evening peak partially charged. Most factory defaults favour export over charging; this behaviour should be explicitly reviewed and changed where necessary.

The solar charge should be deferred — not started at first light. Between early morning and approximately 10:00, solar should serve loads directly while the battery rests at its morning floor. Starting the bulk charge when irradiance is approaching its daily peak means faster charging, better panel efficiency, and — across the installed base — a more pronounced midday demand dip on the national grid curve. How this deferral is implemented depends on the inverter platform: some support a self-consumption period type that achieves it natively; others require a charge current limit or a scheduled block.

4

Evening Discharge — Battery as Primary Source Through the Peak

The evening peak is the critical window — the highest national demand period of the day. The battery should be the sole source through this period, with grid draw suppressed and export disabled. The same 40% floor applies. In winter this window runs broadly from 17:00 to 20:00; in summer the peak shifts later, broadly 18:00 to 21:00. Both seasonal variants should be considered at commissioning and documented clearly. If battery capacity is insufficient to maintain the floor through a typical winter evening peak, that is a design conversation, not a configuration adjustment.

5

Geyser and Large Loads — Out of Both Peak Windows

The geyser is typically the largest controllable load on a residential installation. Running it inside either peak discharge window forces the battery to cover it at the expense of other loads, or draws from the grid at the worst possible moment. Scheduling it during solar midday or deep overnight off-peak removes it from the battery’s discharge burden entirely. The same principle applies to any other large schedulable load — pool pumps, underfloor heating, EV charging. The specific scheduling method will depend on what controllable switching is available on site.

6

Seasonal Variation — Summer and Winter Profiles Differ

As the load curve makes clear, the summer and winter demand profiles are meaningfully different in shape and timing. Evening peak starts earlier in winter, morning peak is sharper, and solar generation windows are shorter. A system configured for summer conditions will not behave optimally through winter. Whatever approach is used, the seasonal difference should be considered — whether through dual seasonal configurations, a scheduled review, or a platform that adapts automatically.


The Bigger Picture

South Africa has approximately 5 GW of embedded rooftop solar installed, growing by over 1 GW per year. The midday dip now visible in the national load curve is direct evidence that the installed base is having a measurable effect on grid demand. That is a meaningful achievement.

But the morning and evening peaks — the two moments of greatest daily grid stress — remain almost entirely served by Eskom’s conventional generation fleet. At 18:00 on a winter weekday, the grid is carrying 29+ GW. The sun is down. Solar contributes nothing. At 07:00 the following morning, demand is surging toward 26 GW and most battery systems are still recovering from the night.

The hardware to change this is already installed on rooftops across the country. The potential is tens of gigawatt-hours of active daily dispatch capacity sitting in residential batteries, cycling once a day at best, configured to serve the client’s convenience rather than the grid’s need.

The gap is not hardware. It is not cost. It is configuration knowledge and the professional standard to apply it on every job. That is entirely within the control of the installer.

What Flattening the Curve Actually Means

A flatter load curve means less strain on generation and transmission infrastructure, fewer emergency generation events, a more stable grid frequency, and a lower average cost of electricity production for everyone. For your clients it means genuine energy independence at the moments that matter — morning and evening, every day, not just during load shedding. For the industry it means installations that can be pointed to as a demonstrated contribution to grid stability rather than a rooftop accessory that happens to reduce one person’s electricity bill.

Summary of Principles — Not a Prescriptive Checklist

The following summarises the intent behind each phase of the dispatch approach described above. How each is achieved depends on the inverter platform, site conditions, and available controls. The goal in each case is clearly stated; the method is for the installer to determine.

◎  Overnight: charge battery to ~95% using slow grid draw during low-demand hours
◎  Morning peak: battery as primary source; minimise grid draw; hold 40% reserve
◎  Early solar: serve loads from PV directly; defer bulk battery charging
◎  Midday solar: charge battery to ~95% before exporting surplus
◎  Pre-evening: battery fully charged and held in reserve
◎  Evening peak: battery as primary source; suppress grid draw; hold 40% reserve
◎  Large loads (geyser, pool): scheduled outside both peak discharge windows
◎  Seasonal difference: addressed — whether through dual configs or platform adaptation
◎  All of the above regardless of tariff structure

The panels are the easy part. Anyone can put panels on a roof. The value you add as an installer is in the intelligence of what sits behind them — a dispatch strategy that puts stored energy into the grid at the moments of greatest need, twice a day, every day, summer and winter.

A battery configured for active full-day dispatch is doing its job. Everything else is leaving the work half done.

Data source: Eskom Data Portal — Actual Residual Demand, Apr 2022 – May 2026 · TOU periods: Eskom Megaflex/Municflex Schedule of Standard Prices 2025/26 (NERSA, effective 1 April 2025)

Residual Demand reflects metered dispatchable generation and imports. It excludes contracted renewables and embedded rooftop PV — meaning true consumer demand is higher than plotted.

Filed Under: News, Tips Tagged With: Curve, Demand, Eskom, Solar

Why you shouldn’t leave a charger plugged in when not in use

4 November 2024 By //  by Alan

Leaving a charger plugged in when not in use can be dangerous because it can overheat and potentially cause a fire. While it’s fine to leave a charger plugged in for a short period, it’s best to unplug it when not in use to reduce the risk of fire.

Filed Under: Tips Tagged With: Charger

How do I check if an Electrician is properly registered in South Africa?

24 September 2023 By //  by Alan

First of all you will need to directly ask your electrician if he/she is a registered master or installation electrician and for their registration numbers for themselves and their business.

To verify the above, you can:

Visit the website of the Electrical Conformance Board of South Africa (ECBSA) – https://electrician.org.za/ – and search for your electrician there. The ECB SA is the official regulatory body for electricians in South Africa.

Enter the necessary details to perform the search. This may include the electrician’s name, registration number, or other identifying information.

OR

Visit and search the members of the Electrical Contractors Association of South Africa (ECA SA) – http://search.ecasa.co.za/ – and search there. PLEASE NOTE: The ECA SA is the largest voluntary association for Electrical Contractors and as such carries a lot of weight in the industry along with being more up to date than other associations.

VERY NB: It is always best practice to confirm your search results from official sources and verify the information provided via the phone numbers for the two associations or via email.

Contact Details:

  1. ECB NATIONAL OFFICE | Telephone: (012) 751 2290 | E-Mail: info@ecb.org.za | PO Box 912479, Silverton, Pretoria, 0127
  2. ECA SA Physical Address: ECA(SA) House, 91 Newton Road, Meadowdale Ext.2, Germiston, 1401 | Postal Address: PO Box 9683, Edenglen, 1613 | Telephone: (011) 392 0000 | Fax: (011) 974 9402 | Email: info@ecasa.co.za
  3. The Contact details for ECA SA regional offices in Johannesburg, Pretoria, Durban, Bloemfontein, Gqeberha, Cape Town and East London are to be found on the ECA SA web site under Contact Details.

Complaints?

  • The ECB has a section where you can submit a complaint here: https://electrician.org.za/contact-us/
  • The ECA SA has a Certificate of Compliance complaint form here: https://ecasa.co.za/membership-2/membership-2-coc-complaint/

Quote the relevant numbers from your CoC such as CoC number, electrican and conmpany name and registration numbers given.

A CoC is a certificate issued by a qualified and registered master or installation electrician that Certifies that an installation is in compliance and in accordance with Regulation 7(1) of the Electrical Installation Regulations, 2009 at the time of the inspection.

CoC’s are issued under the aegis of the Department of Labour Occupational Health and Safety Act, 1993.

Straton Electrical
Sample Header of an Electrical Certificate of Compliance.

Filed Under: Tips Tagged With: Certificate of Compliance, CoC, Registered

Easy Electrical Troubleshooting for Humans

24 September 2023 By //  by Alan

The pride of doing simple tasks at home and not having to call a professional – like Straton Electrical – to do it is something that is pretty fulfilling. When it comes to electrical work the scope of work that can be done by a DIY person is limited mostly to non life threatening tasks such as changing a plug top, lightbulb, geyser element and troubleshooting why certain parts of the home have no power.

Here are some short instructional guidelines on how to wire a plug, wire a light switch, change a light bulb, change a geyser element, troubleshoot electrical problems around the home and how to diagnose a continual Earth Leakage Unit tripping problem:

How to Wire a Plug:

  • Gather the necessary tools: a screwdriver, wire cutters/strippers, and a new plug.
  • Remove the cover of the plug by loosening the screws.
  • Strip the insulation off the end of the wire, exposing about half an inch of copper.
  • Loosen the screws on the plug terminals.
  • Connect the coloured wire to the corresponding terminal (usually red to live, black to neutral, and green/yellow to earth).
  • Tighten the screws securely to ensure a proper connection.
  • Replace the cover and tighten the screws.
  • Double-check all connections and test the plug before using it.

How to Wire a Light Switch:

  • Before starting, switch off the power to the circuit at the main electrical panel.
  • Remove the existing switch cover plate and unscrew the switch from the electrical box.
  • Locate the wires connected to the switch: typically, a red (live) wire, a black (neutral) wire, and a ground wire.
  • Disconnect the wires from the old switch, making sure to note their positions.
  • Connect the corresponding wires to the new switch, using wire nuts or the appropriate connectors.
  • Carefully tuck the wires back into the electrical box, ensuring they are not pinched or damaged.
  • Securely screw the new switch into place and replace the cover plate.
  • Turn on the power and test the switch to ensure it is working correctly.

How to Change a Light Bulb:

  • Ensure the light switch is turned off before replacing the bulb.
  • Allow the old bulb to cool down if it was recently in use.
  • Gently twist the old bulb counterclockwise to remove it from the socket.
  • Take the new bulb and align the base with the socket.
  • Insert the bulb into the socket and twist it clockwise until it is snug.
  • Avoid touching the glass part of the bulb with bare hands to prevent oil transfer, which can shorten its lifespan.
  • Turn on the light switch to test the new bulb.

How to Change a Geyser Element:

  • Switch off the power to the geyser at the main electrical panel.
  • Turn off the tap supplying wtare to the Geyser.
  • Open the hot water tap in your bathroom to drain the geyser.
  • Locate the access panel on the geyser, usually found near the bottom.
  • Remove the access panel using a screwdriver or the appropriate tool.
  • Identify the heating element, which is a long tube-shaped component.
  • Disconnect the wires from the element by unscrewing the terminals.
  • Unscrew the old element using a wrench or the appropriate tool (newer elements use Allen Keys), turning it counterclockwise.
  • Insert the new element and tighten it clockwise.
  • Reconnect the wires to the new element, ensuring a secure connection.
  • Replace the access panel and tighten the screws.
  • Open the tap and fill the geyser with water.
  • Turn on the power and test the geyser to verify proper functioning.

How to Troubleshoot Electrical Problems around the Home:

  • If you encounter no electricity in your home, start by checking the load shedding schedules.
  • Check that the main municipal Circuit Breaker supplying power to your home is is in the “on” position.
  • Check that your meter is ‘consuming’ electricity.
  • Check the circuit breakers in your distribution board to ensure all switches are in the “on” position or fuses are intact.
  • If a specific area of your home has lost power, check if any circuit breakers have tripped and reset them if necessary.
  • Inspect outlets or switches for loose connections or signs of damage. If found, switch off the power and consult a licensed electrician for repairs.
  • If a light fixture is not working, check the bulb to ensure it’s not burnt out. If the bulb is fine, switch off the power and examine the wiring connections within the fixture.

For persistent electrical issues or if you are unsure about troubleshooting, it’s always best to consult a qualified electrician for assistance.

Diagnosing a continual Earth Leakage Tripping problem can be challenging, but here are some steps you can follow to identify and troubleshoot the issue:

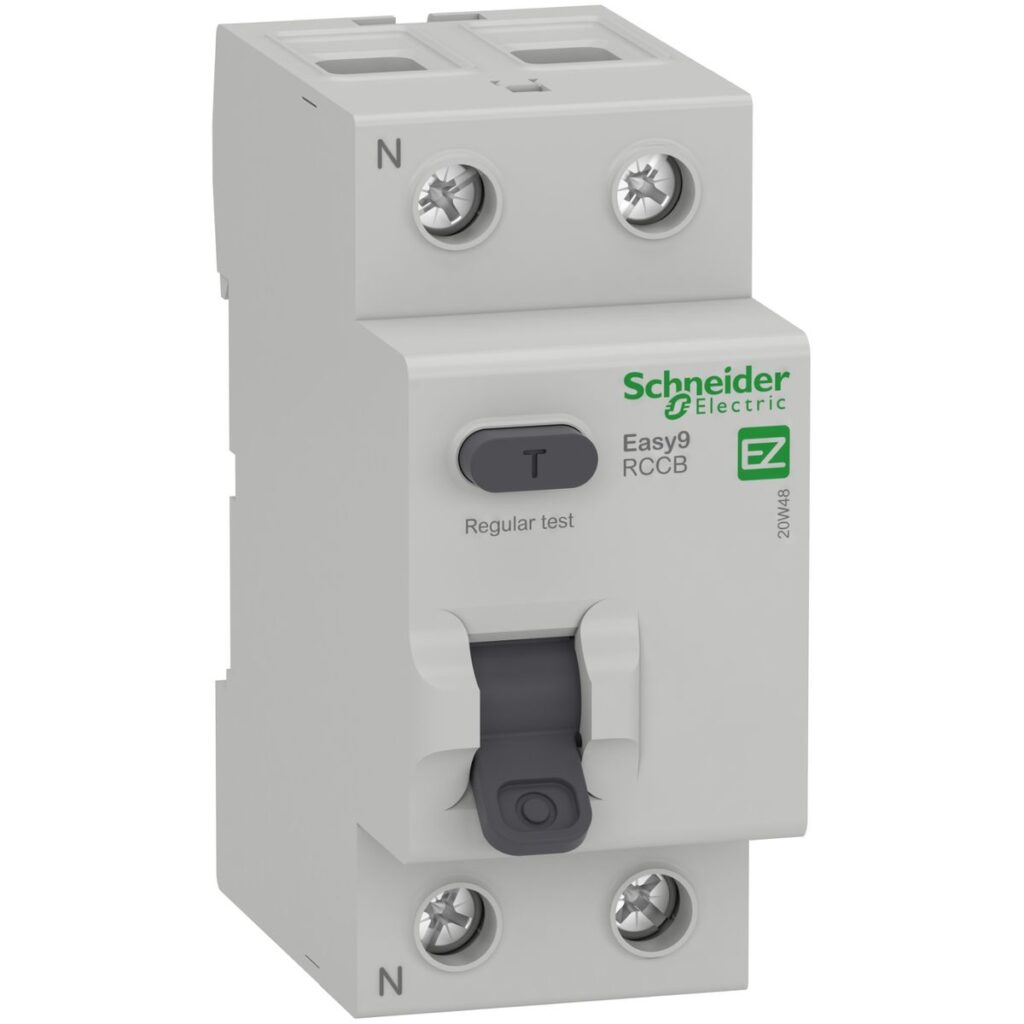
Schneider ELU With Test Button

Understand Earth Leakage Tripping:

  • Earth Leakage Tripping occurs when an electrical circuit detects an imbalance between the current flowing into the circuit and the current returning through the neutral wire.
  • This imbalance can be caused by a fault, such as a short circuit or a leakage of current to the earth.
  • An Earth Leakage Unit (ELU) must function properly in order to protect you from being shocked and possible being killed.
  • Test your ELU often – press the TEST button on the ELU to check that it does trip. If it doesn’t trip then call an electrician immediately to have it replaced.

Initial Precautions:

  • Before starting any troubleshooting, ensure your safety by switching off the power to the affected circuit at the main electrical panel.
  • Use appropriate personal protective equipment (PPE) such as insulated gloves and safety glasses when working with electrical components.

Identify the Circuit:

  • Determine which specific circuit is causing the Earth Leakage Tripping. This can be done by switching off all individual circuit breakers and then switching them on one by one, observing which circuit triggers the tripping.

Check Appliances and Devices:

  • Disconnect all devices and appliances connected to the circuit causing the tripping.
  • Gradually reconnect each device one by one and observe if the Earth Leakage Tripping occurs when a specific device is connected.
  • If the tripping only happens with a particular device, it may indicate a fault within that device. You may need to have it repaired or replaced.

Inspect Wiring and Outlets:

  • Carefully examine the wiring and outlets associated with the circuit.
  • Look for any signs of damage, loose connections, or exposed wires.
  • Tighten any loose connections and repair or replace any damaged wiring or outlets.

Moisture and Water Intrusion:

  • Moisture and water can cause Earth Leakage Tripping. Check for any signs of water ingress near electrical components, outlets, or wiring.
  • In a household the appliances combining electricity and water are normally the first ones to cause a problem – fridegs, freezers, washing machines, kettles being the foremost.
  • Ensure that all outdoor circuits, such as those for swimming pools or garden areas, are properly grounded and protected against moisture.

Consult a Professional Electrician:

  • If you have followed the above steps and are still unable to identify the cause of the Earth Leakage Tripping, it is advisable to consult a professional electrician.
  • A licensed electrician will have the expertise and specialized equipment to diagnose and resolve complex electrical issues safely.

Remember, electrical work can be dangerous, so if you are unsure or uncomfortable with any of these tasks, it’s always best to hire a professional electrician for help.

“When employing an electrician to do work that requires adding to your installtion make sure that your chosen professional is a Registered Master or Installation Electrician and, preferably, is also a member of an electrical contractors voluntary association like the Electrical Contractors Association of South Africa (ECA SA). The ECA has a search facility on their web site listing all members. With the ECA you get peace of mind and the comfort knowng that you have a third party to report any concerns or bad workmanship to,” says Straton Electrical.

Filed Under: Tips Tagged With: Earth Leakage Units, Geysers, Lights, Plugs, Tips

Tips To Survive Loadshedding

25 August 2023 By //  by Alan

Loadshedding has become South Africa’s Number One ‘Sport’ as various Ministers and a parade of CEO’s peddle the latest quick fix solution.

Many of us cannot afford a decent Solar System to keep the lights on and have developed our own coping mechanisms to make loadshedding just that tiny bit more palatable.

Here are 15 tips to help you survive load shedding risks, without the need of a generator or solar panels:

  1. Know your schedule: Make sure that you keep track of any scheduled outages in your area by downloading a reputable Eskom load shedding app on your smartphone. Alternatively, ask to be added to a group of friends who can keep one another updated on planned load shedding schedules.
  2. Be security savvy: The sad reality is that criminals also study load shedding schedules to identify which areas will be vulnerable at specific times. Tripped and false alarms are great opportunities for opportunistic burglars. Be extra vigilant about access to your home and securing your perimeter.
  3. Get back-up batteries for your alarm and gate system: Ensure that your alarm system is in a working condition and the back-up battery is fully functional to provide power to the system in the event of load shedding. Similarly, check that your garage door motor or electronic gate can function without power.
  4. Make sure you have sufficient back-up lighting: Keep a torch or headlamp in your car if you arrive home at night during a power outage. Most smartphones have built-in torches or torch apps which come in handy during unexpected power outages – which bring us to the next point…
  5. Always stay charged: Ensure your cellphone, laptop and tablet devices are fully charged ahead of scheduled blackouts. Be sure to charge them again as soon as possible after the power returns. It’s also a good idea to have an emergency phone charger and power bank close by. This comes in handy during extended power outages.
  6. Plan to stay connected: Staying connected to the internet is a great way to keep in touch with what’s happening as well as for regular updates, so ensure that your mobile data stays topped up. Remember to use devices sparingly during outages so that you don’t drain the battery completely before the power returns.
  7. Don’t forget the benefits of gas: Invest in a small gas bottle and lamp to for cooking and lighting. A gas lamp provides good quality lighting for a large area and a gas cooker can be a life saver during electricity cuts. It’s a good idea to keep hot water in a thermal flask so that you can make hot drinks. Prepare meals beforehand if you know there’s going to be a scheduled blackout during meal times.
  8. Stock up on bottled water and pop some in the freezer: Some households depend on electric pumps for their water supply, especially in rural areas. Frozen bottled water will help keep food cold during a power outage and will also not spoil. Having a few extra bottles handy will ensure you won’t run out during outages.
  9. Keep the cold in: Leave your freezer and refrigerator doors closed as much as possible to preserve the temperatures inside. Did you know that a fully stocked freezer should keep food safe for up to two days and a refrigerator for four to six hours?
  10. Unplug your cables as soon as the power goes out: Consider any electrical connection as live during a power outage as power can return at any time. Unplug any electronic devices or equipment or switch it off at the wall, including fixed telephone cables. This will help prevent damage or injury due to surges that may occur when electricity is restored.
  11. Back up your data: If you save important data on our home computer, consider backing it up over the internet in case of a hard drive crash or unforeseen electrical fault. Online cloud-based backups are very convenient and are mostly automated, which means that you have one less thing to worry about.
  12. Know your emergency contacts: Save emergency contact information on your phone but also keep a printed copy close by. This should include emergency services such as the fire department, police and medical services. Also include contact information of friends and family along with your insurance information.
  13. Buy perishables in smaller amounts: With longer and more frequent blackouts, perishables like vegetables are more likely to spoil. So, shop sparingly. While your fridge/freezer can preserve food for a few hours without power, the higher stages may not give the system enough time to reach optimal temperatures. While we often advise buying in bulk to save, in this case, less is definitely more.
  14. Plan tasks around the schedule: Cook when you can so you don’t spend money on takeaways or going out. Time your laundry so you don’t end up with a half-washed load that needs to be rewashed when the power comes back. All these little expenses add up.
  15. Gather the family together: Instead of having each family member squirrelled away in their own room, gather everyone together. You’ll be using fewer lights and spending more quality time together.

Electric surges are one of the biggest causes of damage to your household equipment during a power outage. Installing a surge protection device can help minimise some damage in unforeseen situations. Have a surge protection device fitted to your electrical distribution board or at the power outlets to electronic devices. Contact a profession electrical contractor to discuss the process and costs involved.

Filed Under: Tips Tagged With: Eskom

Eskom’s Top 50 Electricity Saving Tips

25 August 2023 By //  by Alan Leave a Comment

Saving electricity leads to longer lasting appliances and less load on your electrical installation. In the long run this will save you lots of money. Eskom has shared these tips that every household can use to save energy and money:

Geysers

1. Set your electrical geyser’s thermostat at 55 ° C to 60 ° C.  To save energy, make sure the geyser and all hot water steel pipes in the roof are well insulated with fibreglass or newspaper.

2. Solar heating units could reduce the geyser’s electricity consumption by 40% to 50%. This would result in a savings of about 200kWh to 250kWh of electricity per month, depending on the number of geysers and the size of the family.

Lights

3. Switch off the lights when they are not needed.

4. Use fewer bulbs with higher wattages. For instance, one 100 watt bulb produces the same light as two 60 watt bulbs.

5. Dimming switches reduce electricity consumption.

Use the correct heaters. Infrared electricity heaters are the most energy efficient heaters available while oil heaters are the safest.

6. Use compact fluorescent lamps (CFL) instead of ordinary bulbs.

7. Use low-energy lamps for exterior lighting.

Heating

8. Use the correct heaters. Infrared electricity heaters are the most energy efficient heaters available while oil heaters are the safest.

9. Insulate the ceiling and seal air gaps in the home.

10. Ensure that heaters have thermostats.

11. Use electric blankets but turn them off when in bed.

Dishwasher

12. Fill the dishwasher completely before operating it.

13. Turn off the dishwasher before the drying cycle so that you can wipe the dishes clean with a dry cloth.

14. Connect the dishwasher to the cold water supply.

15. Clean filters.

16 When buying a dishwasher, look for energy saving features like a short wash cycle.

Install your dishwasher away from your refrigerator. The dishwasher’s heat and moisture make the refrigerator work harder.

17.  Install your dishwasher away from your refrigerator. The dishwasher’s heat and moisture make the refrigerator work harder.

Tumble Dryers

18. Tumble dryers that operate with an electronic humidity control are the most efficient as they automatically shut off the drying cycle when clothes are dry.

19. Use correct temperature settings to minimise the amount of electricity used.

20. Remove water before putting clothes into the tumble dryer.

21. On sunny days, take the opportunity to dry your clothes outside.

Automatic washing machines

22. A front loading washing machine uses less water and costs less to operate.

232. Use the warm water setting to cut down on electricity needed to heat the water.

24. Make sure you have a full load before washing.

25. Select the shortest possible washing programme.

Keep oven doors closed until food is cooked.

26. Cold water detergents reduce electricity consumption.

Stoves

27. Use pressure cookers when preparing food that takes a long time to cook.

28. Match pots and pans to stove plates. Small pots on large plates waste electricity.

29. Do not use pots with distorted bottoms.

30. Switch off the plates or oven before food is fully cooked. This allows you to finish your cooking without using energy.

31. Keep oven doors closed until food is cooked.

32. Do not preheat the oven. It isn’t necessary to preheat the oven except for food requiring high temperatures and slow cooking times.

33. Make use of the oven’s leftover heat. Your oven retains heat for 15 to 30 minutes after it is turned off. Use that free heat to warm up desserts, rolls or freshen crackers and cookies.

34. Glass and ceramic pans retain heat better than metal pans.

Don’t open the fridge door unnecessarily and make sure the seal is intact.

35. Use the self-cleaning feature only when it’s necessary. Start the self-cleaning cycle right after cooking while the oven is still hot. Less energy will be required to reach cleaning temperature.

Microwave Ovens

36. When you defrost food, leave it in the fridge overnight. You’ll use less electricity than defrosting food in the microwave.

37. Use the microwave to cook small to medium quantities of food. For larger portions of meat, it’s better to use a conventional oven or pressure cooker.

Refrigerator

38. Don’t open the door unnecessarily and make sure the seal is intact.

39. Turn off an empty refrigerator when going on holiday.

40. Let hot foods cool down before placing them in the refrigerator.

41. Defrost fridges regularly. A build-up of ice reduces operating efficiency and increases running costs.

Freezers

42. Defrost the freezer regularly. Freezers work harder to remove heat and have to use more power. Only 90% of a freezer’s capacity should be used for freezing.

General

43. Do not buy larger or more powerful appliances than are actually required.

44. Do not buy an electric appliance when a hand-operated one will suffice.

45. Use the correct appliance for the job e.g. do not make toast on the stove or in the oven.

46. Do not fill a kettle if only a small quantity of boiling water is required. It is sufficient to put in only enough water to cover the element.

47. It is more economical to boil water in a kettle rather than in a pot on the stove.

48. Always use an iron that is thermostatically controlled. You can avoid ironing clothes by removing clothing promptly from tumble dryer and folding them carefully.

49. Operate swimming pool filter pumps for minimum periods.

50. Paint the walls of your home in a light colour. Dark colours tend to absorb light, requiring you to use more energy from light bulbs to achieve the same effect.

Article courtesy of Eskom.

Filed Under: Tips Tagged With: Eskom, Tips

Electricity Saving Tip – Heaters

16 February 2021 By //  by Alan

What Type of Heater is cheapest to run? Infrared Type Heaters.

Infrared heaters provide exceptionally efficient room heating using radiation – heating people, objects and surfaces directly without wasting energy warming the air.

The cost of a heater is an important consideration in the selection process. There are two cost components to bear in mind: the purchase price and the cost of running the heater. The purchase price is an easy, direct comparison. Running costs depend on the type and cost of the fuel source and the efficiency with which the heater turns this fuel source into useful heat.

In South Africa, we mainly make use of electricity or gas as fuel sources for heaters. The benefit of gas is that it provides instant heat and is available when electricity supply (loadshedding) is a concern. The downside is, however, that gas in South Africa is considerably more expensive than electricity (despite recent electricity price hikes). Almost all electrical heater options are significantly more economical than gas heaters.

Decide what type of heat you need – quick and warm (convection type heaters) for people staying in a room for short periods of time will be more expensive than slow and warm (wall panel type heaters) for bedrooms.

Infrared heaters are more electricity efficient than other space heating systems. These types of heaters can be used both for spot heating and area heating. They transfer energy directly by radiation, creating heat and comfort instantly without the use of air-circulation fans. An infrared heater will warm the people in the room rather than the space. Infra-red heaters often use metal-sheated infrared radiation elements, reflector lamps or quartz tubes.

The oil filled heater is the safest type of heater for the bedroom. A thermostat control switches the unit on and off as required, but to save energy, only use on the lowest comfortable setting.

Electric blankets consume little electricity. However, the correct method of use is to switch them on to the highest setting and warm the bed just before climbing in – then switch them off.

Close doors and windows when using a heater.

Go further and save more with: Building Automation Systems / Solar PV Installations / Metering Solutions.

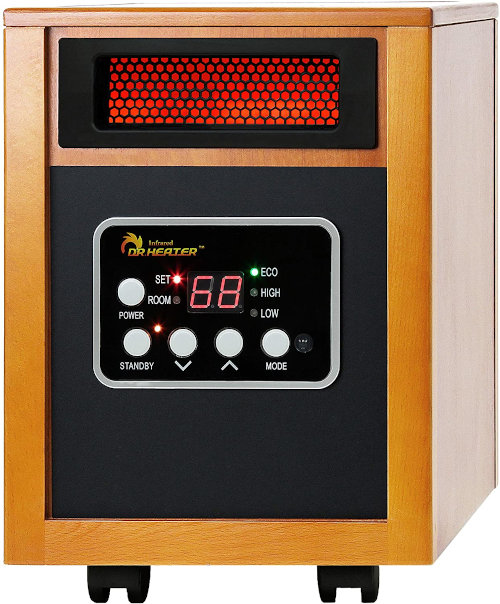
Dr Infrared Space Heater
Dr Infrared Space Heater (or is it a boom box?)

It is important to give some thought to how you are likely to use the heater and select the best type for your application. Consider the cost of running the heater in your preferred way. Also bear in mind the safety of open elements, gas leaks, etc. Whichever option you select, be sure to start with no cost or lowest cost warming options first. Dress warmly, make sure curtains are drawn, windows and doors are closed, and openings are sealed. Ceiling insulation is generally a good option to save heating costs. Hot water bottles and electric blankets are other alternatives available for localized warmth at low costs. And remember don’t ramp up the heat too quickly. Hot and stuffy rooms require ventilation which leads to wasted energy and unnecessary costs!

Wall panel heaters have amongst the lowest running costs. These heaters are suitable for heating rooms of up to 12m2. They are easy to install on a wall. However, they use a low wattage so the heat they provide will be less than a gas heater or fin heater, for example. And they aren’t portable.

Most models of infrared heaters have cool-to-touch exteriors and are safe to use with young children and pets in the home. Though clearances are not as much of an issue as with hot-coil heaters, you should remove clutter in the heater’s area to ensure that heat can freely be dispersed to the room. As with any electrical heaters, keep papers, clothing, magazines, and other similar items away from the heater.

Infrared heaters are designed to be room, zone, or space heaters.

The overall efficiency of the infrared heaters depends greatly on how the unit is engineered, constructed, and how much it’s being used in coordination with other heat sources in your home.

There are three models of electric infrared heaters: portable wheeled units with infrared heating technology, compact heaters with (partial) infrared capability combined with other forms of heating systems, and freestanding electric infrared fireplaces.

Bonus Electricity Saving Tip – Insulation

In parts of South Africa, during winter, the heating of rooms is one of the largest sources of electricity consumption in a home. Improving a home’s thermal insulation can save hundreds of Rands a year in space heating costs and improve the home’s comfort.

Insulate The Ceiling:

Insulating the ceiling helps make a home a comfortable electricity efficient place. As much as 50% of heat losses in a house can be attributed to a lack of ceilings and ceiling insulation. If a home’s ceiling is well insulated, heating and cooling expenses can be kept low. The effectiveness of ceiling insulation depends on the type of material from which it is made, its thickness and its density.

Ceiling insulation in SA varies from fibreglass insulation to a type of insulation prepared from a mixture of paper and other materials. The latter is blown into the ceiling, sealing the total roof area. Any of the methods are equally effective and the supplier of these insulation’s will be able to offer reliable information about ceiling insulation.

Filed Under: Tips

Electricity Saving Tip – Iron

16 February 2021 By //  by Alan

The One Small Appliance Most Hated by National Servicemen? The Iron!

Those soldiers will take cold comfort in knowing that the modern day iron has its roots in ancient history. Circa 400 B.C., Greeks would heat a round bar – known as a goffering iron – and use it to produce pleats on robes.

An iron consumes as much energy as ten 100 watt light bulbs. Several steps can be taken to increase ironing efficiency:

  • Iron low temperature fabrics first to reduce warm up time.
  • Iron large batches of clothing at one time to avoid wasting energy reheating the iron several times.
  • Switch your iron off before you are finished and complete the ironing on stored energy.
  • Prevent scorching and wasting energy by not over heating the iron.
  • Use only distilled water in steam irons.
  • Be sure to turn your iron off if you are interrupted whilst ironing.
  • Use the permanent press feature on your washer and dryer if it is available.
  • By removing clothing promptly from the dryer and folding them carefully, many items will require no ironing, or just a quick press.

Go further and save more with: Building Automation Systems / Solar PV Installations / Metering Solutions.

What modern consumers would identify as an iron first appeared in Europe in the 1300s. Called a flatiron it was simply a smooth piece of metal affixed to a handle. The iron would be heated over flames until sufficiently hot, at which time it would be picked up with an insulated glove. A layer of cloth would cover the article of clothing to prevent soot from the iron from staining the finished garment. Once the flatiron cooled, it would be reheated and the process repeated. Besides smoothing wrinkles, ironing served another important function, killing germs in clothing and reducing mildew.

Metal technology began developing in the 1800s, hastening the evolution of the smoothing iron. Flatirons could be heated atop cast iron stoves, making the job much easier and cleaner than fire. By 1870, wooden handles were used, preventing users from receiving burns, as wood is an insulator.

Gas irons were patented in the 1870s, making the devices even easier to use. A gas line would carry fuel to the appliance, which contained a burner to provide the heat.

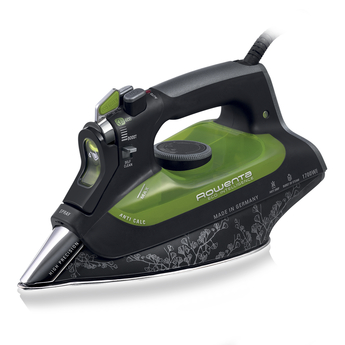
Rowenta Eco Intelligence Steam Iron

The invention of the electric iron coincided with the widespread electrification of American homes in the 1880s. In 1882, Henry W. Seeley of New York City received a patent for the electric flatiron. His model had built-in coils and was heated on a rack. The problem was that it took a long time to heat and cooled rapidly once in use.

Perhaps the biggest breakthrough in smoothing-iron technology occurred early in the 20th century, when irons were made with electric cords. The development helped solve the centuries-old necessity of constantly reheating the iron. Improvements also were made to the sole plate (bottom) of the iron and by the 1920s, many irons came equipped with thermostats to control the level of heat.

In the mid-1920s, the Eldec Company unveiled the steam iron, which facilitated the pressing of dry material. Up to that point, users had to sprinkle water on the fabric. The steam irons funneled water vapor from a receptacle to small holes on the sole plate.

Other improvements in the following decades included the development of an aluminum sole plate that would not rust. In the 1950s, irons capable of both wet and dry operation were introduced, and in 1995, most sole plates had nonstick coating.

Improvements on the sole plate have resulted in more efficient and energy savings. Improved coatings make it less susceptible to scratches from zippers or buttons on garments.

In 2012 Rowenta announced the Eco Intelligence Iron with a new patented Microsteam400 3De soleplate (Patent US no. 7,305,780). Apparently the soleplate is the crux of the energy-efficient design – helping to concentrate steam on the fabric, reducing loss of steam and therefore saving on water usage. The iron is claimed to reduce energy usage by 25%. At a price of around $170.00 (shipping and taxes included) one would have to iron a lot of clothes to justify the price, though.

Filed Under: Tips

Electricity Saving Tip – Tumble Dryer

16 February 2021 By //  by Alan

The most Energy Efficient Tumble Dryers are? Heat Pump Condenser Dryers.

Tumble dryers are very energy intensive appliances since significant amounts of energy are required to heat clothes in order to dry them. As a result, tumble dryers can be one of the major users of energy in households and consumers should carefully consider the energy use of a tumble dryer before making a decision to purchase, as the lifetime cost of using a tumble dryer is often very high.

  • Clean the lint filter on the dryer after each operation to maintain full air flow and to maximise the drying efficiency.
  • Dryers equipped with an electronic humidity control are the most efficient because they automatically shut off the drying cycle when the clothes are dry. Other models are equipped with electric timers which, allow you to select the length of the drying cycle. Here it is important not to overestimate the length of the drying cycle.
  • A permanent press cycle with a “cool-down” period saves energy and dries efficiently.
  • Compact dryers are economical provided that you only have small amounts of clothes to dry. Never overload a tumble dryer but avoid under-loading as well.
  • Use correct temperature settings to minimise the amount of electricity consumed.
  • Over-dried clothes feel harsh and waste energy. Experiment to find the right setting. Some natural materials such as cotton and wool should retain some moisture to avoid wrinkling.
  • Clothes should never be placed in the tumble dryer dripping with water. They should have as much moisture removed beforehand and they should never be folded before being placed in the dryer.
  • Dry clothes in consecutive loads where possible. The dryer will be warm already and will save on initial energy consumption.
  • On sunny days take advantage of good weather and dry your clothes outside.

Go further and save more with: Building Automation Systems / Solar PV Installations / Metering Solutions.

To protect consumers from purchasing inefficient tumble dryers, Minimum Energy Performance Standards (MEPS) have been set for tumble dryers. Currently, only tumble dryers with an Energy Efficiency Rating of Class D or better can be sold.

A key consideration for consumers considering buying a tumble dryer is the annual cost of running a tumble dryer.

Samsung Heat Pump Tumble Dryer
A Heat Pump Tumble Dryer like this Samsung can set you back around R13 000.00

It was Frenchman Pochons, who in 1799 created the ventilator – and it was this initial design that became the early antecedent of the tumble dryer. Essentially a metal drum with holes, clothing was placed inside the drum and dried over an open fire with a hand cranking system.

It was a design that worked, but it did suffer the major disadvantage of leaving clothes smelling of smoke and occasionally dusted in soot. Its basic design, however – a ventilator system comprising of a metal drum with holes – remains the foundation of all tumble dryers.

American George Sampson, patented the first name ‘clothes dryer’ in 1892. It took the basics of Pochon’s original design and dramatically improved on them – he came up with the idea of a metal drum with a rack that dried clothes but away from the main source of heat. Replacing the original open fire concept with a stove, it made the dryer not only more efficacious, but also safer.

Even as early as 1915, it was possible for consumers to purchase early design tumble dryers for their home. As with any new technology, however, it came at a price, and the luxury of being able to dry your clothes so quickly and conveniently came with a hefty price tag.

It wasn’t until 1938 that another inventor, J. Ross Moore, further refined the tumble dryer’s design that made it possible for the general public to purchase the dryer at a more cost-effective and pocket-friendly price. Called ‘June Day’, it came in gas and electric models.

The 1940s saw tumble dryer sales go stratospheric, and it wasn’t long before a battle commenced amongst various manufacturers and brands keen to capitalise on the dryer’s success. For the consumer, this had the advantage of driving the price down even more.

The end of World War II saw the baby boomer generation take advantage of even further advances in tumble dryer technology. The mid-to-late 40s saw the addition of temperature controls, timers, exhaust mechanisms and a cool cycle.

In the 1950s a dryness sensor was invented, meaning that the dryer would automatically switch off when the clothes were dry – an innovation that saved time and money for consumers.

1965 saw the release of the permanent press cycle. In the mid-70s a microelectronic controller facility was added to tumble dryers – a feature that improved on the dryness sensor that effectively controlled all aspects of the drying cycle, including the length of time and levels of dryness.

1983 saw the additional feature of delayed start timers in tumble dryers, meaning people could set their dryers to start at specific times of the day.

Saving energy is the 21st century mantra, but in the mid-80s this was a revolutionary way of allowing people to monitor and conserve their energy usage.

Further advances have been made to cater for the green culture and modern obsession of energy efficiency, and these developmental leaps mean money and natural resources continue to be saved.

The Hydronic Dryer was created by Hydromate Technologies, and uses hydronic power to dry clothes. And LCD touch screens – similar to the control functions of many modern appliances – are a common feature of contemporary tumble dryers that allow you to, for example, pre-set buttons and functions of the drying cycle, including start and stop times.

Even one of the most common complaints about previous dryers – the noise – has partially been remedied by new models which have noise reduction features, as well as specially designed suspension systems that reduce the levels of shaking of the machines.

Filed Under: Tips

Electricity Saving Tip – Washing Machine

16 February 2021 By //  by Alan

Is a Front or Top Load Washing Machine the most efficient? Front Loading Machines are the most efficient.

A key consideration for consumers when buying a washing machine is the size of the machine. Running a washing machine with a large drum but with a load that is much smaller than its capacity will waste electricity, so consumers should select a washing machine size that is appropriate to their household size. Washing machines with a smaller drum are best suited to households that do regular, small washes. Washing machines with a larger drum are best suited to households that need to wash large loads at one time.

Energy Savings Tips for Washing Machines:

  • Washing machines that are used regularly can be significant users of both energy and water in households. Purchasing a more efficient washing machine will save electricity and water for years to come.
  • Buy a washing machine, which offers a variety of water temperature settings.
  • A front loading washing machine uses less water and costs less to operate even though the purchase price may be higher than a top loader.
  • Use warm and cold water setting as much as possible in order to cut down on energy needed to heat the water.
  • Take advantage of special features on your washer that can save money. For example, soak cycles remove stubborn stains in one wash cycle.
  • The automatic washing machine uses the same amount of electricity for a full load as it consumes for a single item. Save dirty clothes until a full load has accumulated.
  • Never overload your automatic washing machine. Overloading will reduce the cleaning action. (Varying the size of garments in a full load improves the cleaning action by allowing free circulation).

Go further and save more with: Building Automation Systems / Solar PV Installations / Metering Solutions.

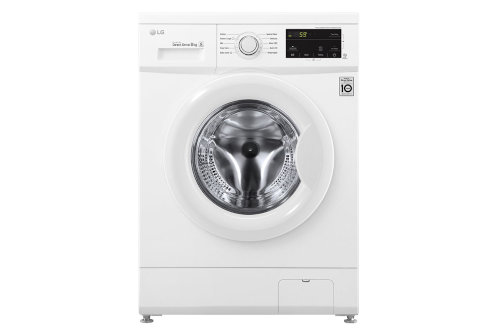
LG Washing Machine
LG Washing Machine

Are energy efficient washing machines worth it?

As it turns out, yes. A shiny new High Efficiency washer will save so much in operating costs throughout the next several years, it’ll be like getting the matching dryer for free. HE washers cost less to operate because they use less water, electricity and even less detergent.

Currently LG has three washing machines in the Energy Star Top 5 most efficient washing machines list.

We owe the invention of the washing machine to Jacob Christian Schäffer (1767). 30 years later, an American, Nathaniel Briggs, obtained the first patent for a washing machine. It involved pouring hot water into a tank, turning a lever to wash the clothes and then wringing them between two rollers. The tank was then drained using a tap.

210 years further on, the electric washing machine was invented.

In 1905, the first drum washing machines appeared. They were still hand-operated but the steel tank allowed for a coal burner to be included.

Towards 1920, the first electric machines were born: only the turning mechanism was electric. The remaining controls were still manual.

It was only in 1930 that the machines became automatic. Pressure switches, thermostats and timers were included in the new models. From the 1980s onwards, advances in the field of electronics meant washing machines became reactive and ecological: Adjustment of parameters thanks to sensors: water level, rate, spinning; Weight sensing; Different cycles: colors, whites, wool, synthetics and Energy & water saving.

In 1990, a British inventor, James Dyson, produced a washing machine with two cylinders which turned in opposite directions, thus reducing washing times and giving better results.

Nowadays, washing machines are connected to the internet and may have integrated Wi-Fi for deferred startup of washing programs, for instance during off-peak times when electricity costs are at their lowest. Some models work without detergent, thanks to electrolysis, which separates the positive and negative ions.

Filed Under: Tips

  • Page 1
  • Page 2
  • Go to Next Page »

Footer

RSS Gqeberha News

  • The Top 10 Digital Marketing Agencies in South Africa (2026)
  • G-Force Festival Set to Thrill Durban as the Virginia Airshow Returns
  • Josh Maraney Launches a Free, Searchable Library of More Than 700 Short-Form Videos
  • FirstRand Volunteers Mobilised 2,500 Employees Nationwide to Honour Mandela’s Legacy Through Action
  • Vital Questions to Ask an AV Client Needing Web Site Development

RSS BA Systems

  • Building Automation: The Future is Here
  • If You Can Measure it, You Can Manage it
  • A Smart Solution for Property Owners
  • Magical C-Bus
  • Embracing the Power of C-Bus, EcoXpert and Beyond

Google Reviews

Click HERE or Snap to leave a Google Review.

Google Reviews QR Code
  • BA Systems
  • Mbane
  • Reach Trust
  • Stratlec Shop
  • Straton Electrical
  • Straton Prepaid
  • Straton Solar

Site Footer

Copyright © 2026 · Straton Electrical · Phone: 041 505 4600 · 13 Mangold Street, Gqeberha, Nelson Mandela Bay, Eastern Cape, South Africa